The ToastiBar ‑ Sales Popup App (formerly known as Sales Notification) is the best tool to boost your store’s sales by displaying recent sales notifications to your store’s visitors and encouraging them to purchase a product from your store. ToastiBar ‑ Sales Popup App (formerly known as Sales Notification) will build trust by letting your store’s visitors know what your customers have ordered.
ToastiBar ‑ Sales Popup App (formerly known as Sales Notification) is a powerful tool that helps to increase your sales. The app will help to display recent order notifications in real time.
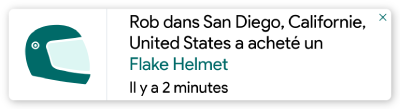
ToastiBar ‑ Sales Popup App (formerly known as Sales Notification) will prompt the visitors to buy the products by showing live notifications as some other people also bought that product like a few minutes ago, a few hours ago, or a few days ago.

Thank you for joining the Sales Notification article. Let’s start the discussion, by default ToastiBar ‑ Sales Popup App (formerly known as Sales Notification App) will be automatically set up with all required settings, and the app should start in your store. Let’s discuss one by one all Settings options.
1) Basic Settings:

Status:
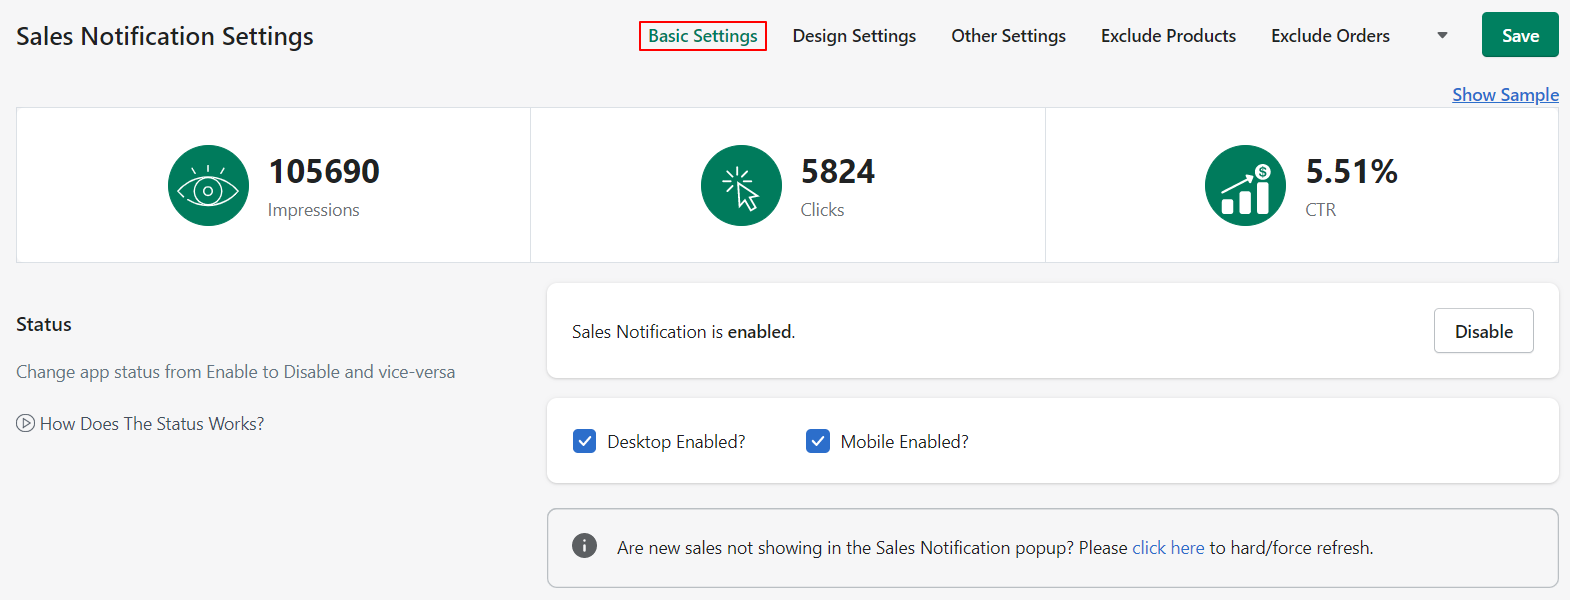
Make sure the ToastiBar ‑ Sales Popup App (formerly known as Sales Notification App) status is enabled to display the Sales Notification pop-ups.
If you just want to disable the pop-ups for a specific device then just untick/uncheck the Desktop Enabled and/or Mobile Enabled checkbox. Please make sure to click on the Save button after making any changes.
Once you receive a new sale, the app will automatically start to show the recent sale in the popup on your website. But, if the new (recent) sale is not showing in the popup automatically then you can refresh (re-fetch) your sales data by clicking the refresh link. Once you click on the link, the app will load your recent sale data and start to display the recent sale in the pop-up.
Template:
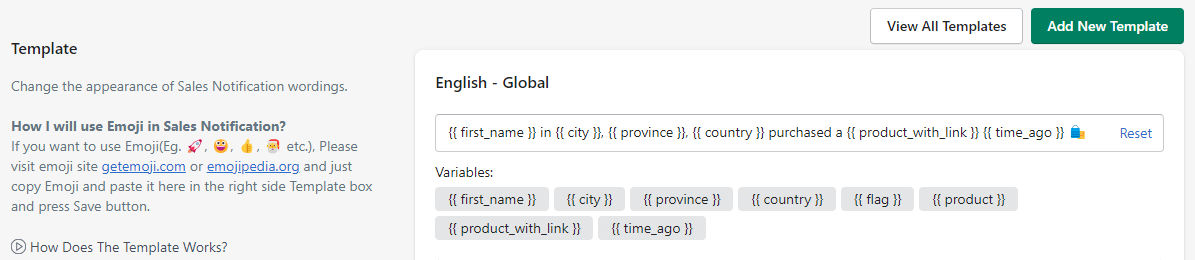
In the ToastiBar ‑ Sales Popup App (formerly known as Sales Notification App), you can customize the popup message by making changes in the template, where the {{ first_name }} variable shows the customer’s first name, {{ city }} variable shows the customer’s city name, {{ province }} variable shows the customer’s province/state name [only for Shopify], {{ country }} variable shows customer’s country name, {{ flag }} variable displays a flag of the country, {{ product }} variable shows purchased product name, {{ product_with_link }} variable shows purchased product name with product page link, {{ time_ago }} variable shows the actual time when the order occurred. And, you can add the Emojis also in the message as per requirements. Also, you can reset the template message with the default message by clicking on the “Reset” [at the right corner].
Please make sure to click on the Save button after making any changes.
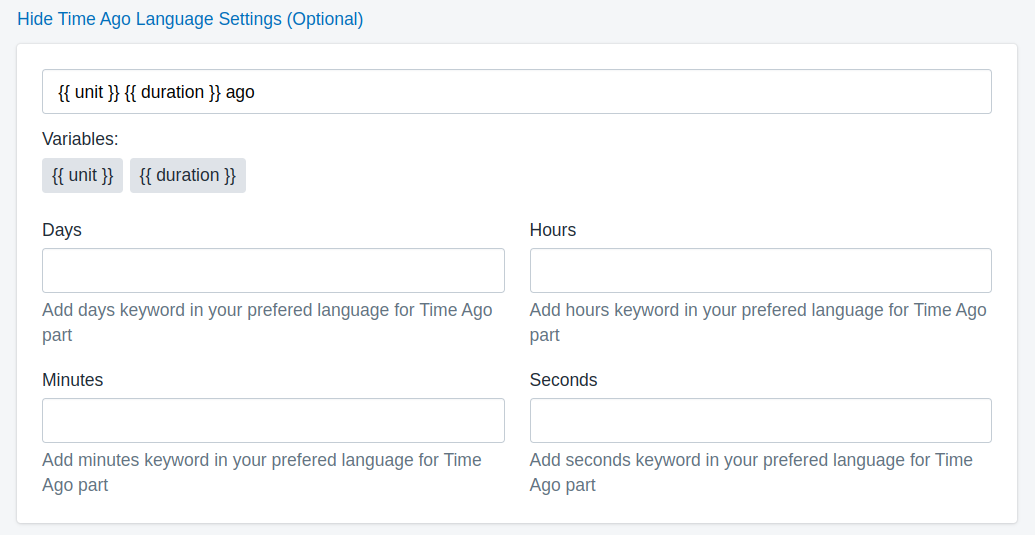
This is a completely optional setting to change the language of the popup. Here, you can customize your popup in your preferred language. This feature is very significant where you can change the language of your popup as you set it.
There are two variables {{ unit }} and {{ duration }}. Where {{ unit }} describes the time of purchasing in digits and {{ duration }} is for the time ago of purchasing the product. The {{ duration }} specifies Days, Hours, Minutes, and Seconds. Here, Days means the number of days ago the product was purchased. Hours means the number of hours ago the product was purchased. Minutes means the number of minutes ago the product was purchased. And Seconds means the number of seconds ago the product was purchased. Those options can be set in your native language whenever you want to customize them.

Add New Template
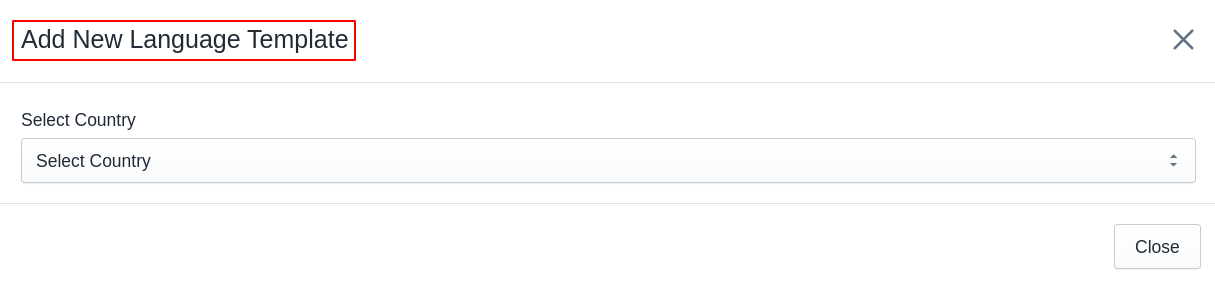
Whenever you want to use a country-specific readymade template, you can use (add) it from the “Add New Template” button. After clicking on the button, the app will display a pop-up named “Add New Language Template”. From the pop-up, just find and select the country. Once you select the country name, the app will display the readymade template for the selected country including the “Time Ago Language Settings (Optional)”. Then if you want you can modify the template otherwise, directly you can use (add) the template by pressing the “Save” button. Once you press the “Save” button, the app will add the template to the list and you will be able to see all the added templates in the list.
Afterward, when a customer visits the website from a specific country, the app will automatically start to display the pop-up in the user’s country-specific language.
View All Templates

The View All Templates button will display the list of the template(s) added for specific countries. Here, you can see the list with Country name, Template, and Action. Under the action, you can edit the template or you can delete the template.
Other Settings:
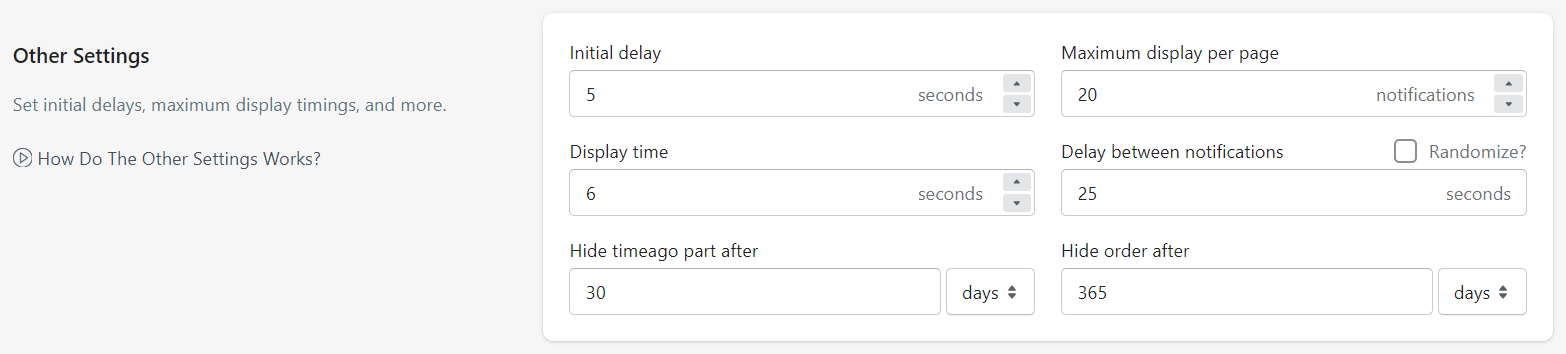
Here in the ToastiBar ‑ Sales Popup App (formerly known as Sales Notification App), Other Settings have several options regarding popup-related timings, where users can customize it as per convenience. Those are discussed below.
1. Initial Delay: You can set the initial delay time as per convenience. The initial delay means when the page is fully loaded, after how much time you want to start to display the Popup. For example, if you set 4 seconds, then the app will start to display the first pop-up after 4 seconds.
2. Maximum Display per Page: You can control the number of popups to show for a page. It means the app will display the specified number of pop-ups on a page if the page is not reloaded. For example, if you set 20, then the app will display 20 pop-ups on a page if the page is not reloaded.
3. Display Time: You can set the pop-up display time. That means you will specify the time for which you want the popup to show. For example, If you set 5 seconds then the popup will appear on the screen for 5 seconds.
4. Delay between notifications: You can set the delay time between two popups.
5. Randomize?: By checking(enabling) this option you can allow auto delay time between two notification popups instead of fixed intervals.
6. Hide timeago part after: You can hide the time ago part by giving the values in seconds, minutes, hours, or days. For example, if you will enter 30 days then the orders will be displayed with time in the popups up to 30 days from the occurrence of the orders. After 30 days, the time will be hidden in the popups automatically.
7. Hide order after: You can hide the order by giving the values in seconds, minutes, hours, or days. For example, if you will enter 365 days then the orders will be displayed in the popups up to 365 days from the occurrence. After 365 days the order will be hidden automatically.
Please make sure to click on the Save button after making any changes.
2) Design Settings:

In the ToastiBar ‑ Sales Popup App (formerly known as Sales Notification App), the Design Setting includes the design of the popup, popup display position, and colors of the popup (personalization). Let’s discuss this.
Choose Design:

Choose design allows you to select any design for the ToastiBar ‑ Sales Popup App (formerly known as Sales Notification App) popup according to your ToastiBar ‑ Sales Popup App (formerly known as Sales Notification App) plan (Free/Paid).

All the above designs are available with the free plan.

All the above designs are available with the paid plan. Also, the paid plan users can use the designs of the free plan.
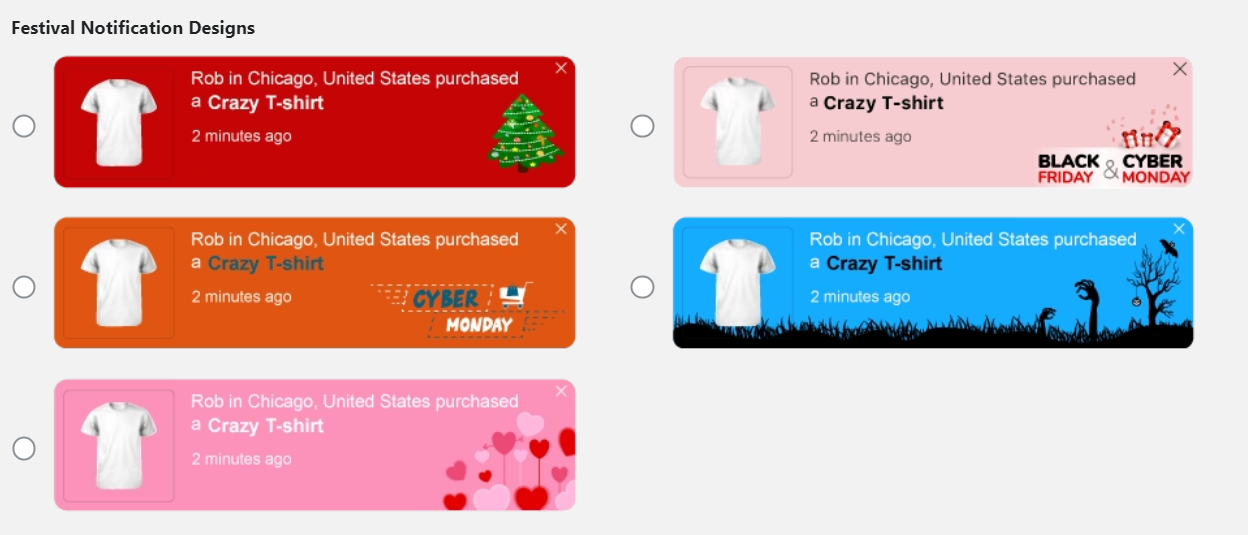
Here, all designs related to festival attractions are available with the free plan. These designs are related to festivals like Christmas, Black Friday, Cyber Monday, Halloween, Valentine’s Day, New Year, Easter, Saint Patrick’s Day, Mother’s Day, Father’s Day, Women’s Day, Epiphany, Advent, Diwali, Holi, Dussehra, Navratri, Rakhsha-Bandhan, and Eid. You can choose any as your requirements.
Notification Settings:

In the notification settings, you can set the notification position, animation type, display direction (by applying pixel values), and product image quality (Reduce page load time) of the popup for desktop and mobile devices.
Desktop
Display direction: You can set the position of the pop for the desktop device as per your choice. You can select any one position from Bottom left, Bottom right, Top left, and Top right.
Animation type: From here, you can choose the animation type for the desktop device to display a notification popup like Fade-In-Out, Slide from Left/Right, and Slide from Top/Bottom.
Top/Bottom: Using this option, you can set the customized position of the popup for the desktop screen. Here, you can set the pixels you want to skip from the Top/Bottom edge of the screen.
Note: If the Display direction is Top, then the app will skip pixels from the top edge. And if the Display direction is Bottom then the app will skip pixels from the bottom edge.
Left/Right: Using this option, you can set the customized position of the popup for the desktop screen. Here, you can set the pixels you want to skip from the Left/Right edge of the screen.
Note: If the Display direction is Top/Bottom Left, then the app will skip pixels from the left edge. And if the Display direction is Top/Bottom Right, then the app will skip pixels from the right edge.
Note: This setting will only be applied on the desktop screen.
Product Image Quality: Using this option, you can select the product image quality to display in the pop-up for the desktop device. The option offers Original, Large, Medium, Small, and Customized. With Customized, you can specify customized size (width) in pixels. Product Image Quality will offer you the option to optimize your product image for desktop. We are recommending the Large or Medium image quality for Desktop devices.
Z-index: This option is useful when you have some other apps or banners that may overlap the notification pop-up. If this happens, then just increase or decrease the value of the Z-index until the pop-up comes before other containers [i.e. widget]. Here, you can specify the value in pixels.
Mobile
Display direction: You can set the position of the pop for the mobile device as per your choice. You can select any one position from the Top or Bottom.
Animation type: From here, you can choose the animation type for the mobile device to display a notification popup like Fade-In-Out and Slide from Top/Bottom.
Top/Bottom: Using this option, you can set the customized position of the popup for the mobile screen. Here, you can set the pixels you want to skip from the Top/Bottom edge of the screen.
Note: If the Display direction is Top, then the app will skip pixels from the top edge. And if the Display direction is Bottom then the app will skip pixels from the bottom edge.
Product Image Quality: Using this option, you can select the product image quality to display in the pop-up for the mobile device. The option offers Original, Large, Medium, Small, and Customized. With Customized, you can specify customized size (width) in pixels. Product Image Quality will offer you the option to optimize your product image for mobile. We are recommending the Medium or Small image quality for Mobile devices.
Z-index: This option is useful when you have some other apps or banners that may overlap the notification pop-up. If this happens, then just increase or decrease the value of the Z-index until the pop-up comes before other containers [i.e. widget]. Here, you can specify the value in pixels.
Personalization:

Here in the personalization option, you can set the color of content and background for your pop-up. Here Product name color is for the name of the ordered product. The Message color is for the popup message which includes the static words. The Notification background color is for the background color of the popup. The Timeago color specifies the color for the time part from the order made. Please make sure to click on the Save button after making any changes.
Custom CSS (Optional):

This is a completely optional and advanced part for customers who have developers/designers with them or who know CSS language design. In a normal scenario, you never need to do anything in the Custom CSS part but if you require extensive customization for the Sales Notification, Cart Notification, Online Visitors Notification, Recent Visitors Notification, Product Visitors Notification, Product Reviews Notification, Order Summary Notification, Low Inventories Notification, Cart Summary Notification, or any other front part of the ToastiBar app, you’ll need to include CSS classes here.
3) Other Settings:

Other settings include the option for closing the pop-ups, the sequence of displaying the pop-ups, disabling notifications at the Home page, Product page, Cart page, and/or any specific page. And UTM Param, which is related to “Google Analytics”. Let’s discuss it all in detail.
Miscellaneous Option:
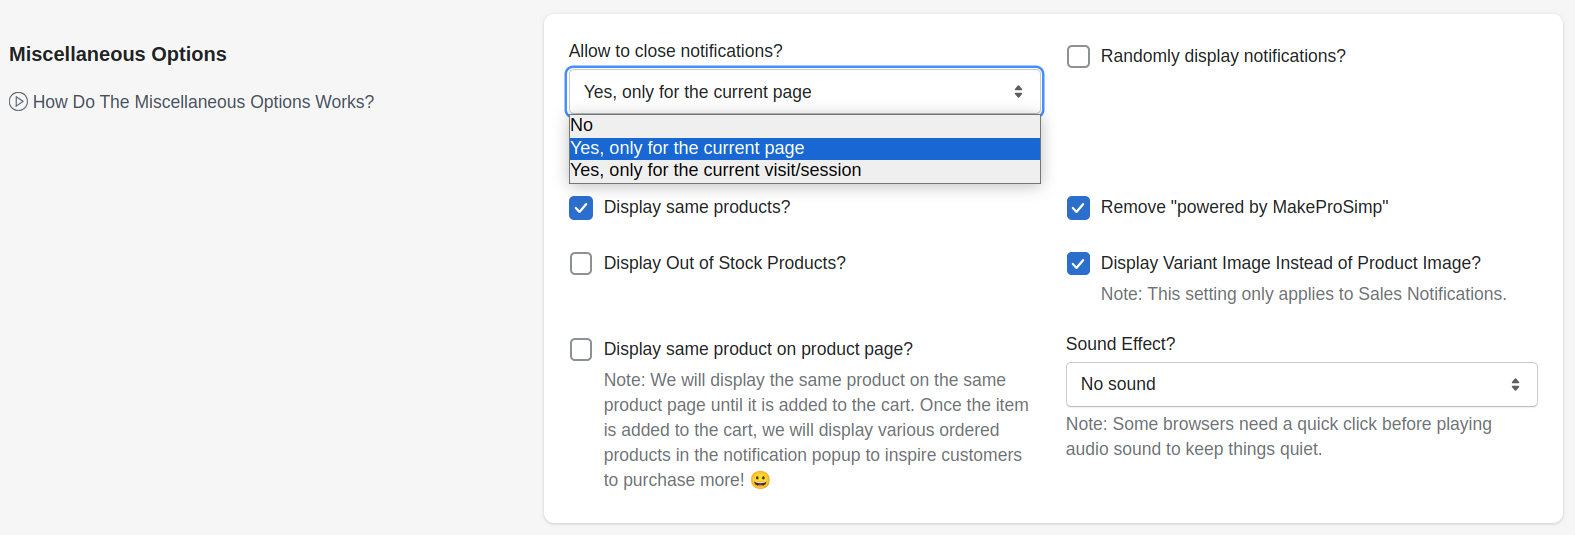
This option is related to setting the sequence of displaying the pop-ups and also, for displaying the pop-ups for the out-of-stock products. There may be requirements other than a display popup like the need to allow the display of the same Product, Display Variant images or Product images, And Display the same product on the product page. Let’s discuss it all in detail.
- Allow to close notifications?: By using this option, you can allow closing notification pop-ups (by clicking on the close icon in the upper right corner of the popup). The option offers 3 below-mentioned conditions:
- No: The app will not allow the customer to close the pop-ups.
- Yes, only for the current page: The app will allow closing the pop-ups for the current page only. When the customer visits the other page or reloads the same page, the app will again start to display the pop-ups.
- Yes, only for the current visit/session: The app will allow closing the pop-ups for the current visit/session and the app will not display the pop-ups till the current visit/session.
- Display Same Products: The same product in your store may be ordered or added to the cart by the users so you can allow it or not display it on the page. By enabling this option, you can allow displaying the same product in the popup.
- Display Out of Stock Product: You can set this option if you want to display a popup for the out-of-stock product that has already been ordered. In your store, there may be several products that have been ordered but now it is not available in your stock. So you can check (enable) the option and set it to display out-of-stock products in the popup.
- Randomly Display Notifications: You can change the sequence of display notifications of the order by checking it. By default, orders will display from the last order means recent orders made will display first, and then further orders will display. When you check this option, the order will display randomly.
- Remove “powered by MakeProSimp”: This option will allow you to remove the “powered by MakeProSimp” mark which is a display with every popup in the bottom position. Removal of “powered by MakeProSimp” is exclusively available in the Paid plan only.
- Display Variant Image Instead of Product Image? [only for Shopify]: There are many variants of products in the store that are ordered. This option will allow you to display a variant image instead of the product image.
- Display same product on product page: You can set this option for better sales.
7.1 For Shopify: When you enable it, the app will display the pop-ups of the same product on the product page until the product is added to the cart. Once the product is added to the cart, the app will start to display the pop-ups of other products to promote other products and inspire the customer to purchase other products. This feature will be available in the paid plan only.
7.2 For Wix: We will display the same product on the same product page. This feature will be available in the paid plan only. - Sound Effect?: This option will allow you to choose sound effects for popups. When a popup appears, it will play a sound. And it will add a touch of auditory charm to each interaction.
Disable Notifications:

This Disable Notifications option allows you to restrict notification popups on different pages. By doing so all the types of notification popups will not be displayed. You can prevent notifications on the Home Page, Product Page, and Cart Page. And, you can also disable notifications on any specific page by including the meta tag on the page.
Disable the ToastiBar app on certain pages by including this meta:
<meta name='mps-sales-notification:active' content='false'>UTM Params:
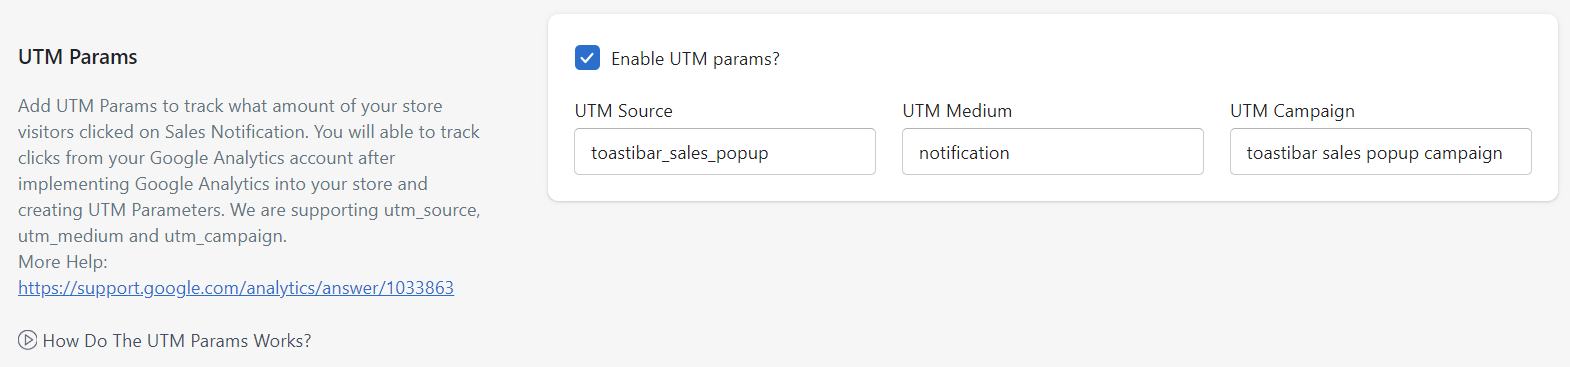
UTM parameters are simply tags you add to a URL — when your link is clicked, the tags are sent back to Google Analytics and tracked. With UTM parameters, you can tag your links to gauge the effectiveness of your campaigns and identify the best ways to drive more visitors to your website.
4) Exclude Products:

This option will allow you to exclude products for displaying popups for them. It means if you do not want to display specific products popup due to out-of-stock or other issues then add these products in the exclude products tray by clicking the Add New Product. To add the product, please search the products with the exact name and then select the products for excluding. Later on, if you want to remove the product that you have excluded, just click on the right side of the product to remove it, and then after, the app will start to display the popup again for the product.
5) Exclude Orders:
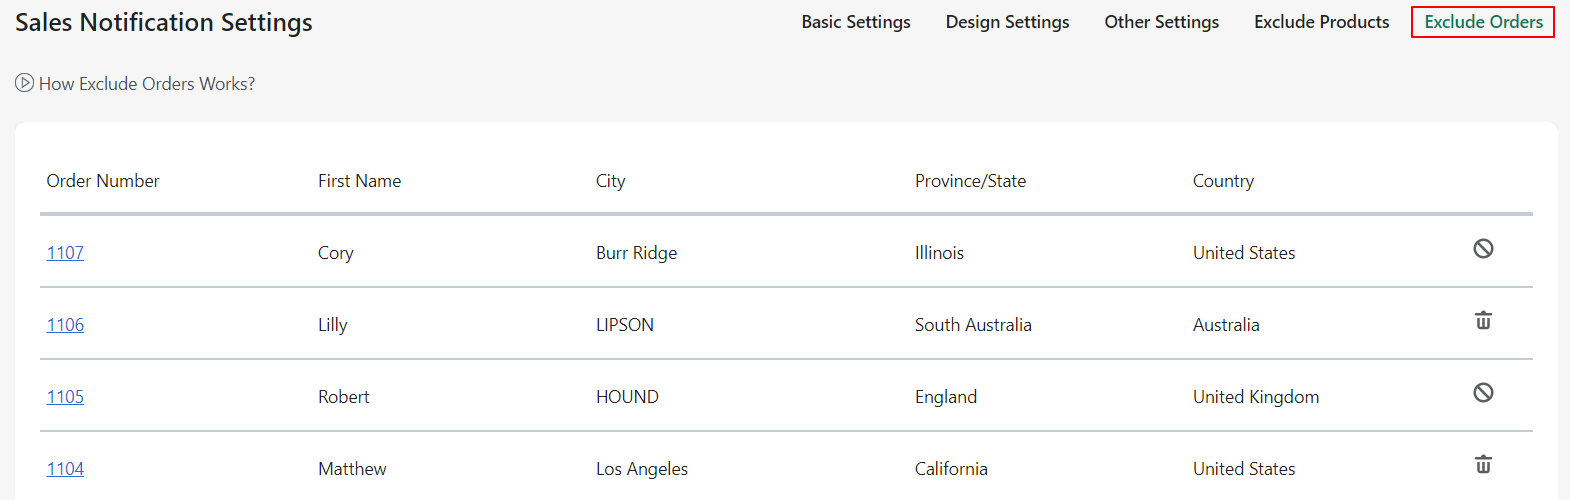
This option will allow you to exclude orders for displaying popups from different available orders. It means if you do not want to display a specific order in the popup due to out-of-stock or other issues then add the order in the exclude order tray by clicking on the right side of every order for excluding. Later on, if you want to remove the order that you have excluded, then just click on the right side of the order, and the app will start to display the order in the pop-up.